See Also
- Adding Notes to an Item
- Adding Inventory Information on an Item
- Adding Weight and Dimensions to an Item
- Adding an Item from an Item Template
- Adding an Item from Scratch
- Creating Items
- Deleting Items
- Duplicating Items
- Entering Listing Upgrades
- Entering eBay Listing Information
- Entering eBay Shipping Information
- Entering Payment Information
- Entering Item Data
- Importing Data into SixBit
- Saving an Item as an Item Template
- Entering Title and Description
- Entering an Allocation Plan
- Entering Etsy Information
- Entering Product and Shipping Info
- Entering Tags and Materials
- Entering Categories and Attributes
- Entering Item Specifics
- Entering eBay Catalog Information
- Adding Items in Bulk
- Printing Inventory Labels
- Adding Pricing Information to an Item
- Adding Product Information to an Item
- Editing Items
- Managing Pictures on an Item
Entering Categories
There are several places where you will need to enter either a site category or a category from your store. The Item Window, Manage Item Specifics Window, and Manage Variations Window all require you to input a category.
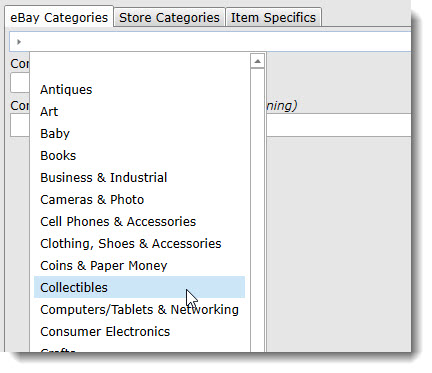
Specifying categories is done using the category "bread crumb" bar.

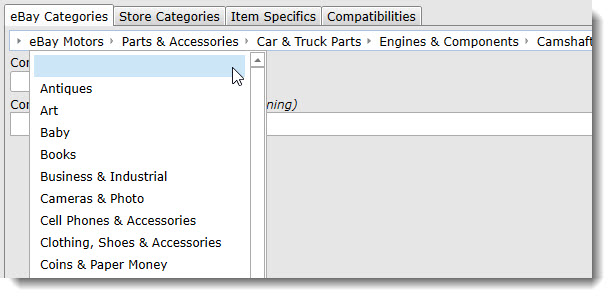
Just like Hansel and Gretel, the "bread crumb" bar leaves a trail to show how you arrived at a chosen category.
On the Item window, the category breadcrumb bar can be found on the eBay Categories tab.

Condition options are dependent upon the category. For example, "New with tags" applies to clothing, but not baseball cards. Once a category is chosen, the conditions available for that category appear in the Condition dropdown.
An optional Condition Description can also be provided to further describe the condition of an item.
With the "bread crumb" bar, the following can be performed:
- drill down to choose a category
- choose a recently selected category
- clear the chosen category
- enter or view a category by number
- view the category on the eCommerce site
Some eCommerce sites also allow you to create your own categories. Just like site categories, site categories will be entered using a "bread crumb" bar. As your own store categories are changed on the eCommerce site, they will need to be updated in SixBit as well. The SixBit Servant will automatically update them for you once a day, but if you have made changes that you want to see immediately, you can manually refresh your categories.
- On the category "bread crumb" bar, click the arrow
on the far left to drop down the outer level of categories.

- If the chosen category has children, an arrow will appear to its right. click the arrow to display and select a child.
- Repeat step 2 until arriving at a leaf category. At any point, return to any ancestor in the chain and use the arrow to the right to start at that branch again.
To choose a recently selected category:
The 10 most recently used categories are remembered by SixBit . Click the arrow at the far right of the "bread crumb" bar to view and choose one of the recently used categories.
- Click the left most arrow on the "bread crumb" bar.
- From the drop down list, choose the empty entry at the top.

To enter or view a category number:
- Click the pencil icon (
 ) to the right of the
"bread crumb" bar.
 - The "bread crumb" bar will be replaced with a text field. If a category has been chosen, its number will appear in a text box. To make a change, enter the category number to be used and click Go. If valid, the category "bread crumb" will reappear with the chosen category.
To view a category on the eCommerce site:
- Click the globe icon (
 )
next to the "bread crumb" bar. The category on the
site will appear in the default browser.
To add a second category to supported eCommerce sites:
- Click the globe add icon next to the "bread crumb" bar. A second breadcrumb bar will appear.
To manually refresh custom/store categories:
If changes are made to the store categories on the eCommerce site, they must be refreshed in SixBit.
- Click the refresh icon (
 ) in the
header of the Store Category group or perform a manual
synchronization of auxiliary data.
