See Also
- Mapping Generic Shipping Services
- Adding a Customs Description Field Walkthrough
- Setting Up Integrated Shipping Partners
- Setting Up Endicia
- Setting_Up_Express_1
- Setting Up ShipRush for FedEx
- Viewing Postage Purchase History
- Setting Default Postage Label Printers
- Setting Up UPS Worldship
- Printing Postage and Carrier Labels
Mapping Values to Postage
USPS and UPS postage both contain fields that allow the user to enter their own information that will appear on the postage or labels. The USPS refers to these fields as Rubber Stamp, and the UPS calls them References.
These fields are useful because they allow users to put custom information on the label to help them identify the labels after they are printed. For example, you could put the OrderID and the SKU on your labels as rubber stamps so you could easily know which order and item the label goes with.
|
|
For Endicia Label Server, USPS Priority Mail Express, USPS First Class letters and USPS International postage do not support rubber stamps on the labels. You can put rubber stamps on these labels when using Endicia Dazzle. |
In addition to the rubber stamps and references, it is also useful to map the values to the Customs Description. By default, the customs description will be set to the title of the item but that is often too much information or not the appropriate information for a customs description. If you'd prefer, you can map any other field to the customs description, including any private item specifics fields you have created.
Mapping Rubber Stamps, References and Customs Description
To map a field to a rubber stamp, reference or customs description:
- Open the Ship Orders mode. How?How?
- From the grid, select an order for which postage will be printed.
- Click the Print Postage icon in the ribbon bar.
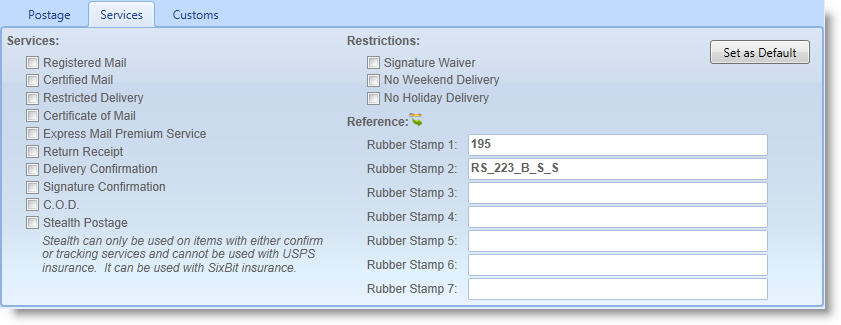
- On the Postage Window, select the Services tab
.
- Click the Mappings icon (
 ) next to the Reference label or Customs Description label to open the Postage Mappings window.

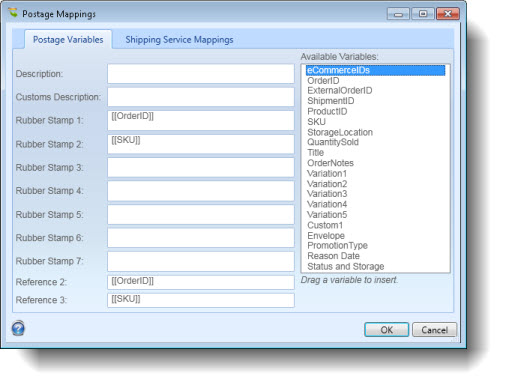
- Ensure that the Postage Variables tab is selected. The list of Available Variables displays all variables that are available to be used as a mapping, including any custom private item specifics have been created at the All level.
- Drag and drop the variables onto the fields for which they will be mapped.
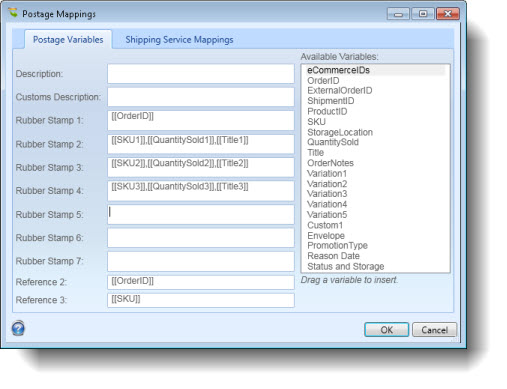
- A packing list can be simulated on the postage label using a special implementation of a subset of the available variables. The variables SKU, QuantitySold, Title, ProductID and StorageLocation can be followed by a number from 1 to 7 to identify unique sales in each shipment. The following example will put the SKU, QuantitySold and Title of the first item in the shipment into Rubber Stamp 2. The SKU, QuantitySold and Title of the second item in the shipment will appear in Rubber Stamp 3, etc.

- Click OK to exit and the values of the variables in the mapped fields will be visible.
|
|
Refer to Adding a Customs Description for an example of how to create private item specifics to be used as a custom description.. |