Entering Custom Field Data
After defining custom fields, data can be entered. The location for entering the data will depend upon the mode of the custom field. Custom fields can be created for the Items, Listings, Orders, Shipments, Sales, Suppliers and Buyers modes.
To enter item custom fields:
- Open the Sell Items mode. How?How?
- Select the item(s) from the grid that are to be edited. How?How?
- From the ribbon bar, click the Edit button.
- Select the Custom Fields tab.
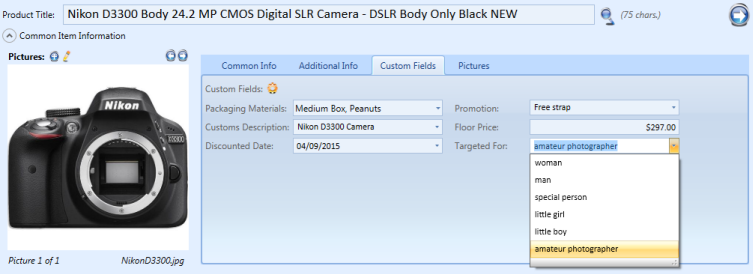
Fill in any applicable custom fields. Dropdowns will display the allowed values, however, you are always free to enter any text in the input boxes.
| As a convenience, the item custom fields will also be displayed and editable on the Custom Fields tab of the Listing Revise window. |
To enter listing custom fields:
- Open the Check Listings mode. How?How?
- From the grid, select the listing that will be revised.
- From the Modify tab on the ribbon bar, click the Revise button.
- Select the Custom Fields tab.
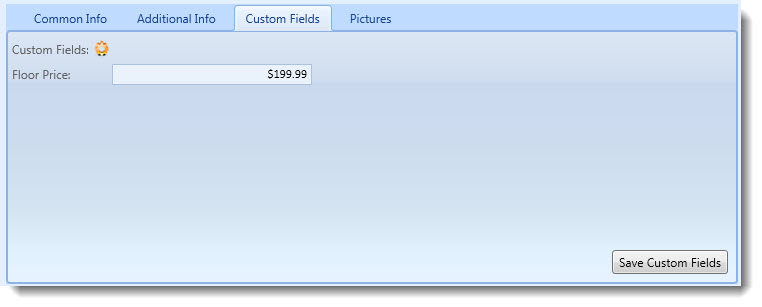
Fill in any applicable custom fields. Dropdowns will display the allowed values, however, you are always free to enter any text in the input boxes.
When finished, click the Save Custom Fields button.
Order, shipment and sale custom fields are all entered on the Order window.
To enter order, shipment or sales custom fields:
- Open the Ship Orders mode. How?How?
- From the grid, select the order for which the custom fields will be entered.
- Double-click the row or click the Edit Order button to open the order record.
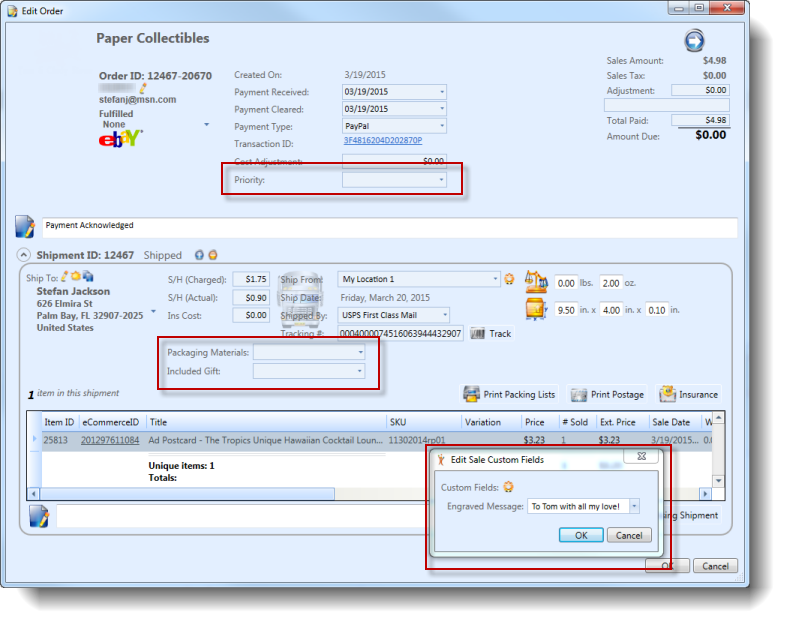
Order custom fields will be displayed at the top center.
Shipment custom fields will appear inside each shipment under the shipping and handling values.
To enter sale custom fields, right click any sale in the sales grid and choose Edit Custom Fields to display the edit window.
To enter buyer custom fields:
- Click the pencil icon
 whenever it appears next to a buyer name to load the Edit Buyer window.
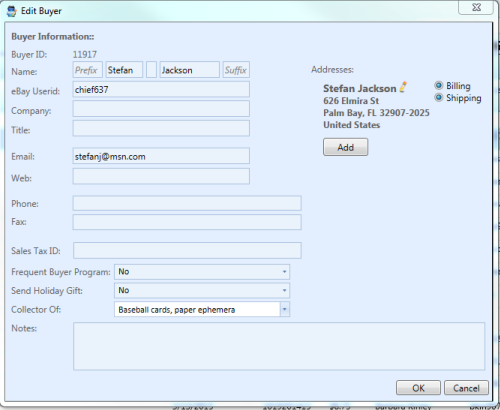
The custom fields will appear just below the Sales Tax ID field.
To enter supplier custom fields:
- Click the pencil icon
 whenever it appears next to a supplier name to load the Edit Supplier
window.
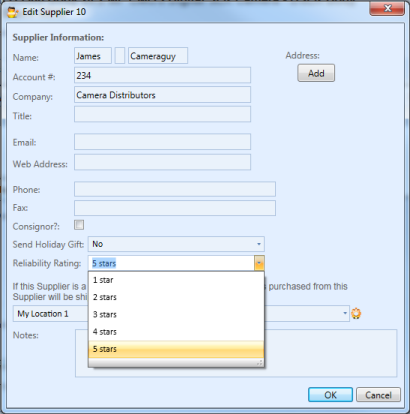
The custom fields will appear just below the Phone/Fax and Consignor checkbox.