See Also
Defining Custom Fields
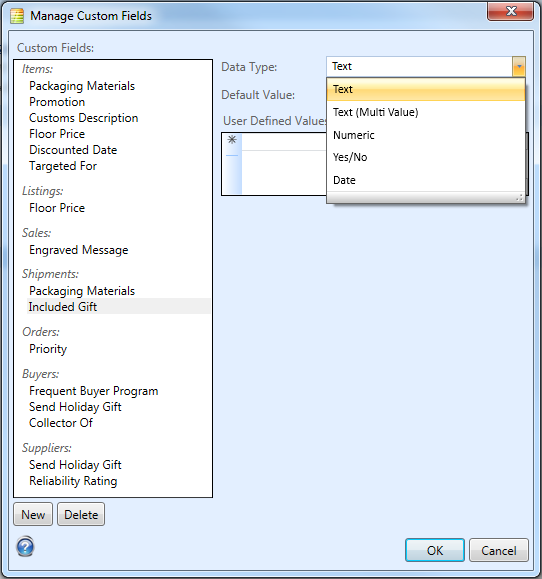
The first step in using custom fields is to define them. Custom fields can have several different data types. They can be either text, multi-value text, numeric (including currency), yes/no, and date types, and depending on the type, you can provide allowed values, min/max values, and defaults.
To define custom fields:
- Manage Custom Fields How?How?

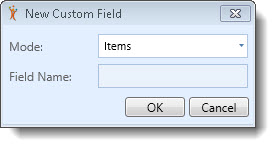
- Click the New button at the bottom of the list of custom fields.

- Choose the Mode. The Mode determines where the data entry will appear and which object the data will be related to. Fields can be particular to Items, Listings, Sales, Shipments, Orders, Buyers or Suppliers.
- Enter a Field Name. This is the name that will appear in the interface so we recommend you keep it short.
- Click OK.
- Make sure the field you created is highlighted in the list of Custom Fields and then choose a value for the Data Type. Depending upon the datatype, the data entry and other properties will change. Allowed values and properties are:
| Data Type | Description | Data Entry | Properties |
| Text | A single text value | Simple text box | Default value |
| Text (Multi Value) | Multiple text values | A dropdown of selectable values that can be checked. | Default value User defined values
|
| Numeric | A number | Numeric editor | Currency Allow decimals Default value Min value Max value |
| Yes/No | A boolean | Checkbox (checked is Yes) | Default value |
| Date | A date | Dropdown date picker | Default value - choose a date or use today's date |
-
When choosing a Text data type, enter any User Defined Values to provide selectable options when entering data into the field.
-
Click OK.
-
Select the Custom Field and click the Rename button at any time in the future to rename the field.