Adding a Customs Description as a Custom Field
This walkthrough demonstrates how to create a custom field called "Customs Description" and map it to postage. It serves as a practical example of customizing SixBit to fit your business workflow. The "Customs Description" field should be defined at the Item, Listings, and Sales levels to ensure it travels automatically through the workflow. The initial entry of the field will occur at the Item level, allowing it to flow seamlessly through the rest of the process.
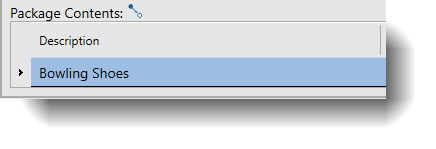
The purpose of the "Customs Description" field is to provide a simplified, accurate description for use on customs forms. Unlike detailed item titles, a concise description like "Bowling Shoes" ensures better readability on customs declarations and avoids truncation issues. This is particularly useful for ensuring compliance with customs regulations and expediting international shipping processes.
Follow these steps to set up and use the custom field:
Define the "Customs Description" Custom Field
- Open the Manage Custom Fields window. How?How?From the File Menu, select Manage|Custom Fields.
- Create a new custom field called Customs Description at the following levels:
- Items: This allows the value to be set when creating or editing an item.
- Listings: Ensures the value travels to listings when the item is listed. Listings will automatically pass the value to the Sales level when the item sells.
- Sales: The field will carry over from Listings when an item sells.
-
Ensure the field name is identical at all levels (Items, Listings, Sales) so the value flows seamlessly through the workflow.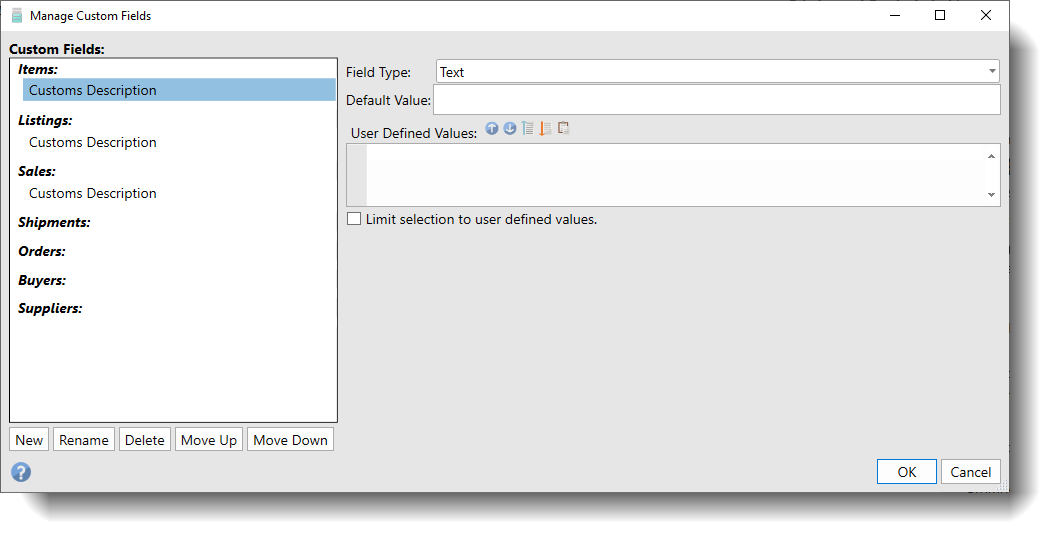
Enter Data for "Customs Description"
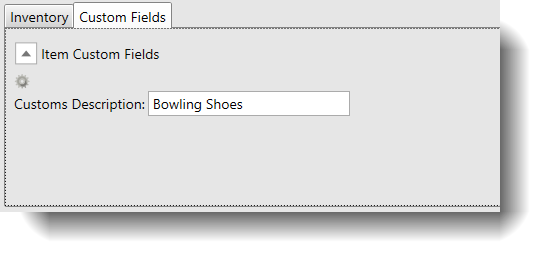
- In Sell Items mode, open an existing item to edit it or create a new item.
- Click on the Custom Fields tab and enter a simple, accurate description for customs purposes.
For example:
- Detailed item title: "3G Belmo Tour S Gold/Black Right-Handed Men's Bowling Shoes"
- Customs description: "Bowling Shoes"
3. Save your changes. If set up correctly this value will now carry forward to Listings and Sales automatically.
How to Add a Customs Description to Postage Mapping
- Open Postage Variables. How?How? In SixBit click File/Application Menu , select Options and click the Postage tab then select Postage Variables, or follow the instructions from Mapping Values to Postage to open the Postage Variables from the Print Postage window.
- Drag Customs Description from the Available Fields list to the Customs Description Variable.
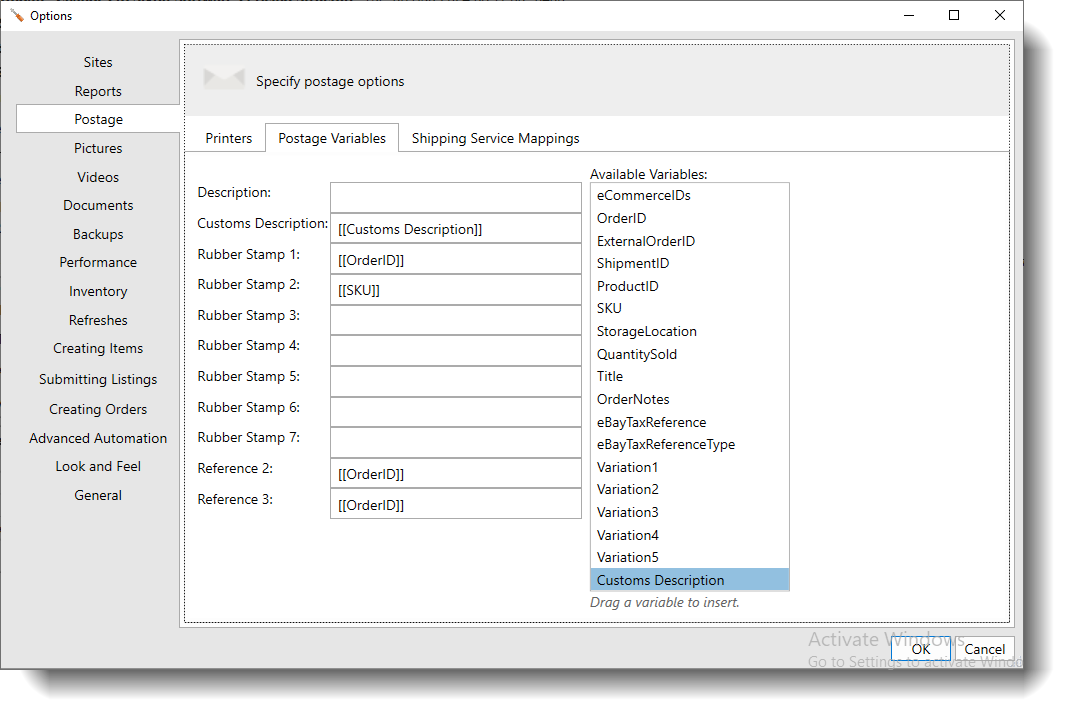
- The value entered on the Item Window will now appear as the Customs Description.