See Also
- Adding Notes to an Item
- Adding Inventory Information on an Item
- Adding Weight and Dimensions to an Item
- Adding an Item from an Item Template
- Adding an Item from Scratch
- Creating Items
- Deleting Items
- Duplicating Items
- Entering Listing Upgrades
- Entering eBay Listing Information
- Entering eBay Shipping Information
- Entering Payment Information
- Entering Item Data
- Importing Data into SixBit
- Saving an Item as an Item Template
- Entering Title and Description
- Entering an Allocation Plan
- Entering Etsy Information
- Entering Product and Shipping Info
- Entering Tags and Materials
- Entering Categories and Attributes
- Entering Item Specifics
- Entering eBay Catalog Information
- Adding Items in Bulk
- Printing Inventory Labels
- Adding Pricing Information to an Item
- Adding Product Information to an Item
- Editing Items
- Entering Categories
- Managing Pictures on an Item
Customizing the Item Window Layout
| Most of these features are demonstrated in our "Item Entry Customization in SixBit" video. Click here to view the video now. |
Entering item information is one of the more time intensive tasks involved with listing items, so we've made sure to make this process as customizable and efficient as possible. There are a lot of fields on the Item window and not all users use all fields, so the item window has been designed to allow for hiding unused fields and laying out the remaining fields in the most efficient order.
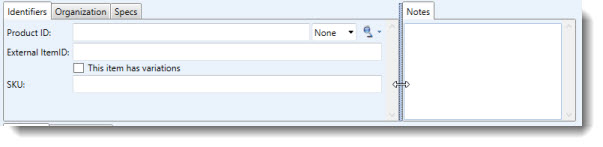
As mentioned previously, the Item Window is broken down into two areas. The top contains all of the item information that is common to all sites and the bottom area contains information that is specific to each site. The relative space between the two areas can be modified by dragging the splitter bar between them.
Each area is made up of different panes that are either shown alone or docked with other panes. Docking panes together results in a tabstrip allowing access to each pane while using less space. Panes that aren't used as often can be docked behind more frequently used panes. In the image below, Notes is an individual pane and Identifiers, Organization and Specs are docked panes.

Panes or docked groups of panes can be resized relative to other panes. Placing the cursor between two panes provides a draggable icon to resize.
Panes can be moved by grabbing the tabs and dragging to the desired location.
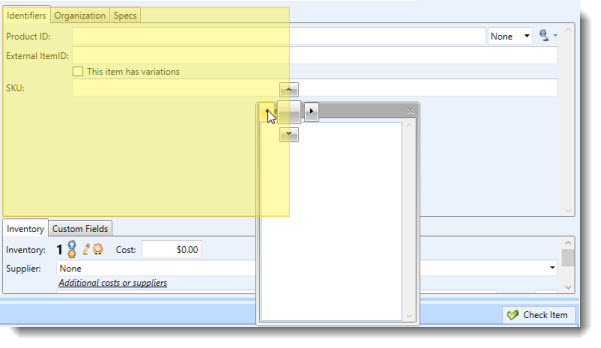
After dragging a pane, the placement compass will appear. Hover on the up, down, left or right arrows to and the yellow box will indicate the location where the dragged pane will be placed. Selecting the square in the middle of the compass will dock the pane to the existing pane and it will then appear as a tab.
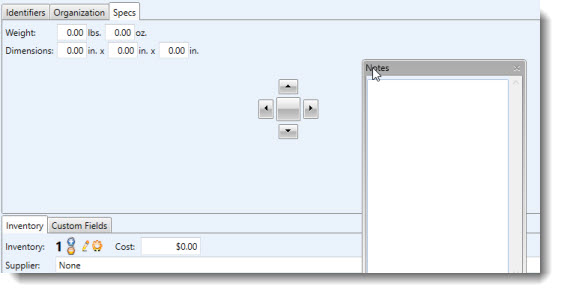
Panes can even be undocked entirely from the Item window by not choosing any area of the placement compass.
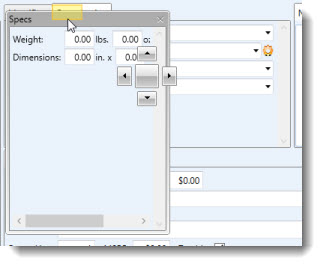
Tabs can be reordered within their docked group by dragging and dropping.
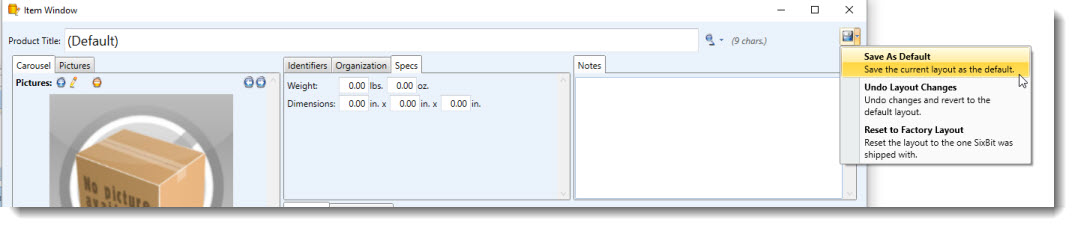
Once a pane layout has been customized, it can be saved as the default. Each time the Item window is opened, the saved default layout will be used. Undesired changes can be undone to revert to the last saved layout, or to start over the layout can be restored to the factory default.
With a little experimentation, a custom layout for your business is easily achieved.